
Common childhood dental problems primarily involve cavities and trauma, affecting children across all age groups in Kathmandu. Cavities develop when bacteria ferment sugars from food and drinks, producing acid that dissolves tooth enamel through repeated exposure over time. Early childhood caries appears in toddlers who sleep with bottles containing milk or juice, while school-age children develop decay in the deep grooves of newly erupted permanent molars where brushing cannot reach effectively.
Treatment options range from preventive interventions to restorative procedures based on problem severity and whether the affected tooth is a baby tooth or permanent tooth. Early-stage cavities appearing as white spots can be reversed through fluoride varnish and remineralization without drilling, while established cavities require fillings, and deep decay reaching the nerve necessitates pulpotomy or root canal treatment followed by crown placement.
Childhood Dental Problems: What’s Common, When It Happens, and When to Worry

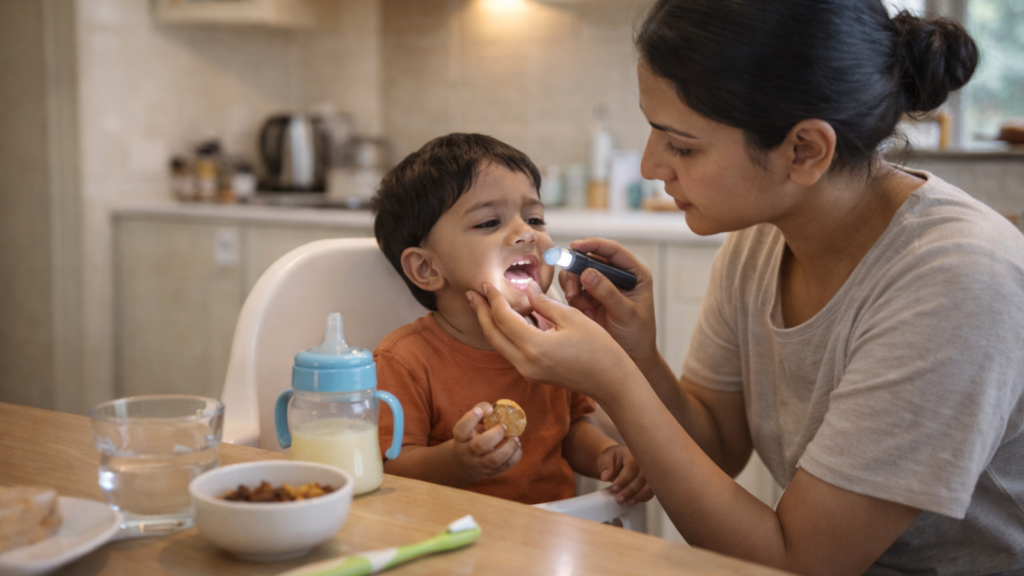
Parents in Kathmandu often discover their child’s first dental problem during a routine meal or bedtime brushing. A dark spot appears on a back tooth, or a playground fall chips a front tooth. These moments trigger immediate questions: Is this urgent? Can it wait until tomorrow? Will my child need treatment?
Childhood dental problems fall into predictable patterns based on age, tooth type, and daily habits. Understanding what typically happens at each stage helps you respond appropriately rather than panic or delay care when timing matters.
Common Dental Problems by Age (0–3, 3–6, 6–12, Teens): What Parents Should Expect
Dental problems cluster around developmental milestones. Each age group faces distinct challenges tied to tooth eruption, motor skills, dietary changes, and independence levels.
- Ages 0–3 (baby teeth erupting): Early childhood caries from prolonged bottle feeding or sippy cup use dominates this period. The upper front teeth decay first because milk or juice pools against them during sleep. Trauma from learning to walk causes bumps and chips. Parents often miss early white-spot lesions because they appear subtle against new enamel.
- Ages 3–6 (full baby tooth set): Cavities spread to back molars where grooves trap food particles. Children at this age cannot brush effectively alone, so plaque accumulates between teeth and along gum lines. Thumb sucking or pacifier habits may begin shifting tooth positions. Dental trauma increases as children run faster and climb higher without refined coordination.
- Ages 6–12 (mixed dentition): The first permanent molars erupt behind baby teeth around age 6. Many parents mistake these for baby teeth and neglect their care, leading to rapid decay in deep grooves. Front baby teeth loosen naturally but sometimes suffer trauma before they are ready to fall out. Sports participation without mouthguards causes tooth fractures and displacement injuries.
- Teens (permanent dentition): Wisdom teeth emerge between ages 17–21, sometimes impacting adjacent teeth or causing gum inflammation. Orthodontic treatment addresses alignment issues that developed earlier. Poor oral hygiene during adolescence leads to cavities and gum disease as independence grows but motivation drops. Energy drinks and frequent snacking introduce new decay patterns.
Recognizing these age-specific patterns helps you anticipate problems before they become emergencies. A 2-year-old’s chipped tooth from a coffee table fall requires different urgency than a 10-year-old’s knocked-out permanent tooth during cricket.
Baby Teeth vs Permanent Teeth: Why Treatment Decisions Are Different
Dentists weigh different factors when treating baby teeth compared to permanent teeth. The decision is not simply “pull it because it will fall out anyway.”
Baby teeth serve critical functions beyond chewing. They hold space for permanent teeth developing in the jaw beneath them. Losing a baby molar at age 5 (when it should stay until age 10–11) allows neighboring teeth to drift into the gap, blocking the permanent tooth’s eruption path. Space maintainers then become necessary to prevent orthodontic problems later.
Baby teeth guide permanent teeth into proper positions during eruption. Front baby teeth help children develop normal speech patterns; losing them prematurely affects pronunciation development. Back baby teeth maintain proper jaw growth and bite relationships as the face develops.
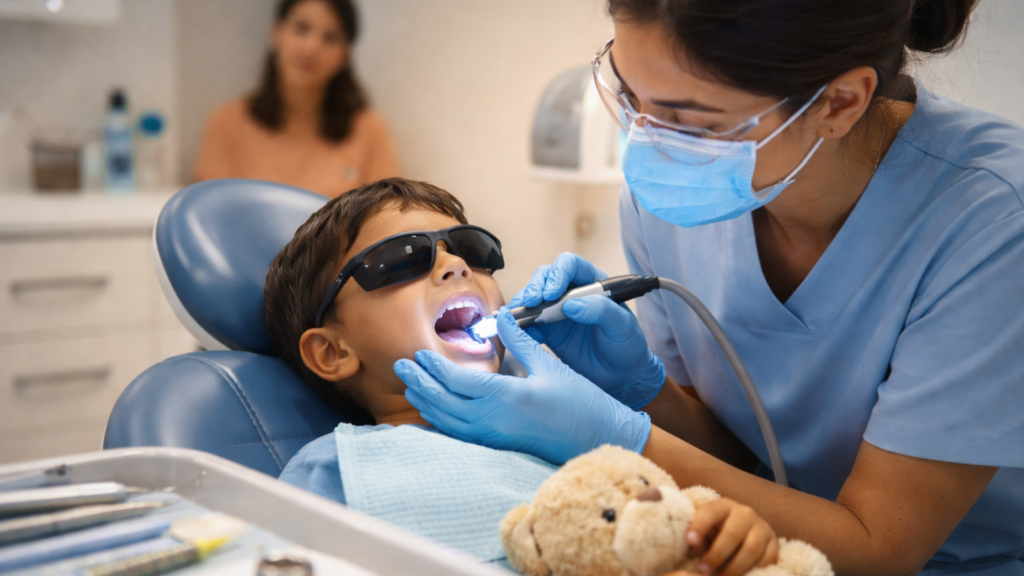
First Dental Visit & “Dental Home”: When to Start and Why It Prevents Emergencies
The first dental visit establishes a foundation that prevents emergency situations later. Timing and consistency matter more than most parents realize.
- Schedule your child’s first dental visit by age 1 or within 6 months after the first tooth erupts. This early visit is not about finding problems. Dentists assess cavity risk factors, demonstrate proper brushing technique, discuss feeding habits that cause decay, and create familiarity with the dental environment before problems develop.
- A “dental home” means one consistent clinic where records track your child’s development over time. The dentist notices subtle changes: enamel defects that need monitoring, shifting bite patterns that may require orthodontic intervention, or behavioral changes suggesting pain before your child verbalizes discomfort.
Preventive relationships reduce emergency visits significantly. Children who establish dental homes by age 2 have 40% fewer urgent care visits than those who first see a dentist during pain episodes. Familiarity with the clinic environment reduces fear and cooperation problems during necessary treatment.
Quick Safety Checklist: When It’s Urgent (Same-Day) vs Safe to Wait 24–48 Hours
Dental problems trigger parental concern, but not every issue requires immediate emergency care. This checklist helps you distinguish genuine urgency from situations that can wait for a scheduled appointment.
Seek same-day care (within 2–4 hours) for these situations:
Permanent tooth completely knocked out and you have the tooth, every minute reduces reimplantation success. Uncontrolled bleeding from the mouth that does not slow after 10 minutes of direct pressure, this may indicate deeper injury requiring stitches. Swelling that closes the eye, extends below the jawline, or causes breathing or swallowing difficulty, these signs indicate spreading infection. Severe pain that does not respond to age-appropriate pain medication, this suggests abscess or deep infection. Tooth displaced into the gum or pushed far out of position, immediate repositioning provides the best outcome. Suspected jaw fracture or signs of head injury after dental trauma, these require medical evaluation beyond dental care.
Schedule next-day or 48-hour appointments for these problems:
Baby tooth knocked out, these are not reimplanted but the child needs evaluation for gum injury and space maintenance planning. Broken tooth with sharp edges causing tongue or lip cuts but no severe pain, the tooth needs repair but is not urgent. Chipped tooth with no pain and no exposed pink tissue inside, cosmetic concern that can be addressed during regular hours. Small cavity causing occasional sensitivity but no constant pain, this requires treatment soon but not emergency intervention. Lost filling or crown causing discomfort but no severe pain, temporary dental cement from pharmacies provides relief until the appointment. Gum swelling around one tooth with no fever or facial swelling, this indicates infection requiring treatment within 1–2 days.
Monitor at home for these situations (schedule routine appointment):
White or brown spots on teeth with no pain, early decay signs requiring professional fluoride treatment. Mild tooth sensitivity to cold drinks that resolves quickly, common and often not urgent. Slightly loose baby tooth that is close to the normal shedding age, natural process requiring no intervention. Bad breath that persists despite good brushing, may indicate early gum disease or large cavities needing evaluation. Food consistently getting stuck in the same spot between teeth, possible cavity or spacing issue to address at next check-up.
Cavities in Children: Early Childhood Caries, Causes, and Symptoms
Cavities develop in children’s teeth through a specific biological process that parents can interrupt if they recognize the early stages. The progression from healthy enamel to painful decay follows predictable patterns, but the timeline varies dramatically based on diet, oral hygiene, and bacterial exposure.
Early Childhood Caries (Baby Bottle Tooth Decay): Feeding Habits That Quietly Cause Decay
Early childhood caries creates distinct decay patterns on baby teeth, primarily affecting the upper front four teeth. This specific pattern reveals its cause: prolonged exposure to sugary liquids during sleep or naptime.
The decay mechanism centers on frequency rather than amount. Putting a child to bed with a bottle of milk, formula, or juice bathes the upper front teeth in liquid sugar for hours while saliva flow decreases during sleep. Bacteria in dental plaque ferment these sugars into acid, which dissolves tooth enamel. Understanding how cavities form through plaque, diet, and dry mouth helps parents identify and eliminate the root causes before decay progresses. The lower front teeth often remain healthier because the tongue covers them and saliva from under-tongue glands provides some protection.
Common feeding practices that cause this decay include: allowing a toddler to fall asleep while breastfeeding on demand throughout the night (breast milk contains natural sugars); providing a bottle or sippy cup filled with milk or juice for self-soothing during naps or nighttime; letting a child carry a sippy cup of sweetened liquid throughout the day, creating constant acid attacks; and offering juice or milk immediately before sleep without brushing afterward.
High-Risk vs Low-Risk Kids: A Simple Cavities Risk Checklist (Toddlers and School-Age)
Cavity risk varies dramatically between children based on biological factors, behaviors, and environmental conditions. Understanding your child’s risk level helps you adjust prevention efforts appropriately.
High-risk indicators for toddlers and preschoolers include these factors:
Visible cavities or white spot lesions already present on baby teeth, past decay predicts future decay. Parent or sibling with active cavities, cavity-causing bacteria transfer through shared utensils, food tasting, or mouth cleaning. Frequent snacking or sipping on sweetened drinks between meals, creating constant acid exposure. Developmental enamel defects or white/brown spots present since teeth erupted, structurally weak enamel decays faster. Special healthcare needs affecting oral hygiene capability, physical or cognitive limitations preventing effective cleaning. Medications causing dry mouth or containing sugar, reduced saliva flow and sugar exposure increase risk.
High-risk indicators for school-age children include these additional factors:
New cavities developing despite previous dental treatment, indicating inadequate home care or high bacterial load. Deep grooves in newly erupted permanent molars, these anatomical features trap food particles despite brushing. Orthodontic braces present, brackets and wires create additional plaque retention sites. Frequent consumption of sports drinks, energy drinks, or soda, acidic beverages cause decay and erosion. Inconsistent dental visits or missed recall appointments, gaps in professional fluoride application and monitoring.
Low-risk children share these protective characteristics:
No visible cavities or white spots during the past 24 months, demonstrating effective current prevention. Excellent oral hygiene with parent supervision and verification, proper technique and consistency matter more than frequency. Limited sugar exposure with most sweets consumed during meals rather than continuously, saliva neutralizes acid during meal-time sugar exposure. Regular fluoride exposure through toothpaste, varnish applications, and appropriate water sources, fluoride strengthens enamel and reverses early decay. Strong enamel with no developmental defects, genetic and nutritional factors create stronger tooth structure.
Cavity Stages Explained: White Spots → Small Holes → Deep Decay/Toothache
Cavities progress through distinct stages, each requiring different treatment approaches. Recognizing early stages allows for less invasive intervention and better long-term outcomes.
- Stage 1: Initial demineralization (white spot lesions). The first visible sign of decay appears as a chalky white spot on the tooth surface, usually along the gum line or in chewing surface grooves. The enamel remains intact but has lost minerals, creating an opaque appearance. At this stage, the process is reversible through remineralization, saliva, fluoride, and calcium phosphate can restore mineral content if the decay process stops.
- Stage 2: Enamel decay (small holes and surface cavities). Continued acid exposure breaks through the outer enamel layer, creating actual holes in the tooth structure. The cavity appears as a brown or black spot, sometimes with visible material breakdown. Enamel decay still causes no pain because enamel contains no nerve endings, so children show no symptoms despite visible damage.
- Stage 3: Dentin decay (spreading and deepening). Decay reaching the dentin layer (the softer tissue beneath enamel) spreads faster because dentin is less mineralized than enamel. The cavity expands sideways and downward toward the tooth’s center. Children begin experiencing sensitivity to cold, sweet, or sticky foods as stimuli reach closer to the nerve. Parents noticing these symptoms should review the full guide on cavity symptoms and tooth filling options to understand what to expect at the dental appointment.
- Stage 4: Pulp involvement (deep decay reaching the nerve). Bacteria enter the tooth’s pulp chamber, causing inflammation and infection, one of the most serious toothache causes in children. Children experience persistent, throbbing toothache that worsens at night or when lying down. Pain becomes severe enough to interrupt sleep and eating. Swelling may develop in the gum near the tooth root. Sometimes a pimple-like bump appears on the gum, draining pus from the infected pulp.
- Stage 5: Abscess and complications. Untreated pulp infection spreads beyond the tooth root into surrounding bone and soft tissues. An abscess (pus-filled pocket) forms, causing severe pain, high fever, and facial swelling. In rare but serious cases, infection spreads to fascial spaces in the neck, eyes, or brain, requiring hospitalization. Learn to recognize tooth abscess danger signs that require urgent treatment so you can act before complications escalate.
How to Spot Cavities at Home: Bad Breath, Food Trapping, Sensitivity, Chewing Changes
Parents who learn to recognize cavity symptoms at home can seek treatment before pain develops. Most symptoms appear gradually and become noticeable only with intentional observation.
- Visual signs require good lighting and close inspection during brushing. Chalky white spots along the gum line or in grooves indicate early decay. Brown or black spots, especially in pits and grooves of back teeth, suggest progressed decay. Visible holes or pits in tooth surfaces indicate established cavities. Discolored or gray appearance in a tooth that suffered previous trauma may indicate pulp death and infection.
- Behavioral changes often signal dental problems before visual confirmation. Persistent bad breath despite regular brushing suggests bacterial accumulation in cavities or gum infections. Food consistently getting stuck in the same spot indicates a cavity trapping particles. Avoiding certain foods, especially sweets, cold drinks, or chewy items, may indicate sensitivity or pain. Chewing predominantly on one side suggests discomfort on the opposite side. Touching or rubbing the cheek or jaw near a specific tooth, even without verbalizing pain, signals inflammation. Increased difficulty falling asleep or waking during the night crying, particularly after eating sweets, suggests dental pain.
- Sensitivity patterns indicate decay progression. Brief sensitivity to cold that resolves within seconds often indicates exposed dentin from small cavities or worn enamel. Prolonged sensitivity lasting 30+ seconds suggests decay approaching the pulp. Sensitivity to heat or warm foods indicates pulp inflammation requiring urgent treatment. Pain triggered by sweets or sticky foods reveals cavity presence even before visual confirmation. Unprovoked pain occurring without stimulus suggests advanced infection.
- Smell changes around teeth warrant investigation. Persistent bad breath in one area of the mouth, despite overall good hygiene, indicates bacterial accumulation in a cavity. Foul taste or smell when flossing between specific teeth suggests food decay trapped in an inaccessible cavity. Swollen gum with a bad smell near one tooth indicates infection draining from the tooth root.
- Physical inspection techniques for parents: Press gently on the gum above each tooth. Swelling or pain indicates possible infection. Tap gently on teeth with a spoon handle. Increased sensitivity or pain suggests inflammation deep in the tooth or bone. Check for loose teeth outside the normal shedding age range, premature loosening may indicate bone loss from infection.
Cavity Treatment Options for Kids (What Dentists Use and Why)
Treatment selection for childhood cavities depends on decay stage, tooth type (baby or permanent), child’s age and cooperation, and expected tooth longevity. Modern pediatric dentistry offers options ranging from non-invasive remineralization to traditional restorations.
Early-Stage Care Without Drilling: Fluoride Varnish and Remineralization Plan
White spot lesions and very early enamel decay can be reversed through remineralization therapy, avoiding drilling and filling entirely. This conservative approach works only when decay has not yet created cavities through the enamel layer.
- Fluoride varnish application forms the foundation of remineralization therapy. Dentists paint a concentrated fluoride solution (22,600 ppm compared to 1,000–1,450 ppm in toothpaste) directly onto cleaned tooth surfaces. The varnish adheres to enamel for hours, allowing extended fluoride exposure. Fluoride ions integrate into the enamel crystal structure, making it more resistant to acid attack and actively rebuilding demineralized areas.
- The remineralization approach requires parent and child commitment. Families must maintain consistent home fluoride application, dietary changes, and hygiene routines for months. Some parents prefer traditional fillings because they provide immediate resolution rather than requiring ongoing behavior modification. However, remineralization preserves tooth structure, avoids anesthesia, and costs significantly less than restorative treatment.
In Kathmandu, fluoride varnish application costs NPR 1,500–2,500 per visit at most clinics. This is reasonable compared to filling costs (NPR 2,500–5,000+ per tooth), making remineralization financially attractive for families managing multiple early lesions.
Fillings and Minimally Invasive Care: ART and When It’s Appropriate for Kids
Traditional fillings remove decayed tooth structure and replace it with restorative material. Minimally invasive techniques preserve more tooth structure while achieving the same decay-removal goals.
Atraumatic Restorative Treatment (ART) uses hand instruments rather than drills. The dentist manually removes soft, decayed dentin with specialized hand tools, then fills the cavity with high-viscosity glass ionomer cement. This approach works only for small to medium cavities that have not reached the pulp. ART avoids the noise, vibration, and heat of dental drills, making it particularly appropriate for young children who cannot tolerate conventional treatment due to fear or special healthcare needs.
Glass ionomer cement used in ART releases fluoride over time, providing ongoing cavity prevention on adjacent tooth surfaces. The material chemically bonds to tooth structure without requiring perfectly dry conditions, making it suitable for young children who have difficulty keeping their mouth dry during procedures. However, glass ionomer is less durable than composite resin or amalgam, so ART restorations are best suited for baby teeth with limited remaining lifespan or low biting-force areas.
In Kathmandu, composite fillings range from NPR 2,500–5,000 per tooth depending on cavity size and clinic location. Glass ionomer ART costs NPR 2,000–3,500. These prices make treating multiple cavities financially significant, emphasizing the value of prevention and early intervention while lesions remain reversible.
Dental Trauma in Children: Falls, Sports Injuries, and What to Do Immediately

Dental trauma accounts for one of the most common childhood injuries in Kathmandu, particularly among active children aged 7–12 years. The immediate response determines whether a tooth can be saved, so parents benefit from understanding injury types and evidence-based first aid before emergencies occur.
Types of Tooth Injuries: Chip vs Crack vs Loose Tooth vs Displaced vs Knocked-Out Tooth
Dental trauma ranges from minor enamel chips to complete tooth avulsion. Each injury type requires different immediate care and has distinct long-term implications.
- Enamel chips affect only the outer tooth surface. Small pieces of enamel break off, usually from the corners or edges of front teeth. The remaining tooth typically appears jagged or rough but shows no pink or red tissue inside. Enamel chips rarely cause pain unless the break extends into dentin underneath. For a detailed comparison of injury severity, the guide on chipped vs cracked vs broken teeth explains how dentists assess and treat each type. These injuries need smoothing to prevent tongue or lip cuts, and sometimes composite bonding to restore appearance. The tooth’s nerve usually remains unaffected, making prognosis excellent.
- Crown fractures extend deeper into tooth structure. Moderate fractures break through enamel into dentin, the yellow layer beneath. You may see dentin exposed but no red/pink pulp tissue. The tooth becomes sensitive to cold air, drinks, and touch. Large fractures expose the pulp (the tooth’s nerve and blood supply), appearing as a red or pink spot in the center of the broken surface. These injuries cause significant pain and require urgent treatment to protect the exposed nerve. Blood on the broken edge after trauma indicates pulp exposure.
- Concussion injuries involve impact without visible fracture. The tooth looks normal but feels tender when pressed or during chewing. The ligament surrounding the tooth root becomes inflamed from impact force. Most concussion injuries heal completely within 2–3 weeks with soft diet and avoiding pressure on the tooth. Sometimes the tooth temporarily responds less to cold sensitivity tests but recovers within weeks to months.
- Loose (subluxated) teeth move more than normal when touched. The impact stretches or partially tears the ligament holding the tooth in its socket. The tooth may feel wiggly and hurt during eating but remains in its normal position. Mild looseness resolves as the ligament heals over 2–3 weeks. Severe looseness requires splinting (temporarily bonding the injured tooth to adjacent stable teeth) to allow healing without displacement.
- Displaced (luxated) teeth move partially out of their normal position. Lateral luxation pushes the tooth forward, backward, or sideways. The tooth appears out of alignment with adjacent teeth and may interfere with bite closure. Intrusive luxation drives the tooth deeper into the jaw bone, making it appear shorter than adjacent teeth. Extrusive luxation partially displaces the tooth out of its socket, making it appear longer and more mobile. All displaced teeth require urgent repositioning (ideally within hours) for best outcomes.
- Completely knocked-out (avulsed) teeth separate entirely from the socket. The tooth is loose in the mouth or has fallen onto the ground. Time becomes critical for avulsed permanent teeth: reimplantation success exceeds 90% within 30 minutes but drops below 5% after 2 hours. The tooth root contains living cells that die rapidly when exposed to air and dry conditions. Baby teeth are never reimplanted, so focus shifts to evaluating other injuries and planning space management.
- Root fractures break the tooth root beneath the gum line. The crown portion may appear normal or slightly loose. Root fractures typically cause less pain than crown fractures because the break occurs deeper in the jaw. X-rays are required to diagnose root fractures since they are not visible externally. Treatment depends on fracture location: fractures near the tooth crown often require extraction, while fractures deeper in the root may heal if the tooth is splinted properly.
- Alveolar bone fractures involve the tooth and surrounding jaw bone. Multiple adjacent teeth move as a unit when touched. Swelling and bleeding from gums are significant. The upper or lower jaw may be visibly displaced or misaligned. These complex injuries require immediate medical and dental evaluation. Some alveolar fractures heal well with proper repositioning and stabilization, but outcomes vary based on fracture severity.
Understanding injury types helps you communicate effectively with dentists during emergency calls. Clear descriptions, “The front tooth is loose and pushed backward” versus “His tooth is hurt”, enable dentists to provide appropriate phone guidance and prepare treatment equipment before your arrival.
First Aid at Home (Safe Steps): Bleeding Control, Cold Compress, Pain Relief Dos/Don’ts
Immediate first aid in the first 5–30 minutes after trauma significantly impacts treatment complexity and outcomes. Parents who remain calm and follow evidence-based steps provide optimal care while arranging dental evaluation.
Control bleeding before assessing other injuries. Have the child sit upright with the head tilted slightly forward, lying down increases blood flow to the head and can cause gagging on blood. Fold clean gauze or cloth into a thick pad. Place it directly on the bleeding area inside the mouth. Have the child bite down firmly on the gauze for 10 continuous minutes without checking or releasing pressure, interrupted pressure prevents clot formation. After 10 minutes, gently remove the gauze and assess. Bleeding that has stopped or is minimal requires no further action. Continued heavy bleeding after 10 minutes of proper pressure requires immediate medical evaluation. Blood mixing with saliva appears more dramatic than actual blood volume, remain calm.
Do not rinse vigorously or allow the child to spit repeatedly. Vigorous rinsing dislodges forming blood clots and prolongs bleeding. If dirt or debris is visible in the mouth, gently rinse once with clean water, then focus on pressure application. Excessive spitting also disrupts clot formation.
Apply cold compress to reduce swelling and pain. Wrap ice or frozen vegetables in a clean cloth (never apply ice directly to skin). Hold the cold compress against the outside cheek or lip over the injured area for 15 minutes. Remove for 5 minutes to allow tissue warming. Repeat the 15-minute-on, 5-minute-off cycle for the first 1–2 hours after injury. Cold constricts blood vessels, reducing swelling and providing numbing effect. You may alternate cold compress application with bleeding control gauze pressure.
Provide age-appropriate pain medication following correct dosing. Ibuprofen (Brufen) reduces both pain and inflammation, making it the preferred first-line medication for dental trauma in children over 6 months. Dose by weight: 10 mg/kg every 6–8 hours (maximum 4 doses in 24 hours). Paracetamol (Cetamol) provides pain relief without anti-inflammatory effect, appropriate for children who cannot take ibuprofen. Dose by weight: 15 mg/kg every 4–6 hours (maximum 5 doses in 24 hours). Do not exceed recommended doses even if pain persists, contact the dentist instead.
Medications and actions to avoid after dental trauma: Never give aspirin to children, it increases bleeding risk. Do not apply topical anesthetic gels (like Orajel) to injury sites, they do not help traumatic injuries and may delay proper evaluation. Avoid giving hard, crunchy, or chewy foods for 24–48 hours, stick to soft diet. Do not touch, manipulate, or repeatedly check injured teeth unnecessarily, this increases pain and may worsen displacement. Never apply heat to swollen areas in the first 24 hours, heat increases swelling and inflammation. Do not allow the child to play contact sports or engage in rough activity until dental clearance.
Look for injuries beyond the obvious tooth damage. Check inside the lips and cheeks for cuts requiring stitches, tears longer than 1 cm or with gaping edges need medical evaluation. Feel along the jaw bones (upper and lower) for tenderness or deformity suggesting fractures. Look inside the mouth for missing tooth fragments, pieces may be embedded in lip or gum tissue. Check that the bite closes normally, misalignment suggests tooth displacement or jaw fracture. Assess for signs of head injury: confusion, repeated vomiting, severe headache, vision changes, or loss of consciousness at any point. These require immediate emergency department evaluation before dental care.
Document the injury for dental evaluation. If possible, take clear photos of the injured area from multiple angles. Note the exact time the injury occurred. Write down what happened (fell forward, hit by ball, etc.). Collect any tooth fragments or knocked-out teeth properly. This documentation helps dentists assess treatment urgency and choose appropriate interventions.
Your immediate response matters most in the first 30 minutes after trauma. Following these steps while contacting your dentist creates the best possible conditions for successful treatment.
Hidden Dangers After Trauma: Missing Fragments, Lip/Gum Cuts, Jaw Injury, Concussion Signs
Dental trauma often involves injuries beyond the obvious tooth damage. Failing to recognize and address these hidden injuries can lead to complications days or weeks after the initial incident.
- Missing tooth fragments require accounting for every piece. When a tooth chips or fractures, the broken pieces must go somewhere. Swallowed fragments pass harmlessly through the digestive system without requiring intervention. Inhaled fragments can lodge in airways or lungs, causing infection or obstruction, children who cough persistently after dental trauma may have aspirated a tooth fragment. Embedded fragments lodge in lip, cheek, or gum tissue, appearing as small bumps or causing continued pain. X-rays of soft tissue or chest are sometimes necessary to locate missing tooth fragments.
- Lip and cheek lacerations require careful evaluation. Through-and-through lacerations penetrate completely through the lip from inside to outside. These injuries require medical sutures (usually facial plastic surgery consultation for best cosmetic outcome). Superficial cuts affecting only the inside mucosa usually heal without sutures within 5–7 days. Gum tissue tears may expose underlying bone or tooth root. Deep gum tears require sutures to cover bone and prevent infection.
- Jaw injuries accompany dental trauma more often than parents realize. Mandible (lower jaw) fractures cause: pain and swelling along the jaw line; difficulty opening the mouth or closing the bite normally; numbness in the lower lip or chin (nerve injury); teeth meeting incorrectly when biting down; and visible jaw deformity or asymmetry. Maxilla (upper jaw) fractures cause: pain in the midface or cheek; excessive mobility of upper teeth as a group; numbness below the eyes or in the upper lip; difficulty breathing through the nose due to bleeding or swelling; and misalignment of upper and lower teeth when biting.
- Concussion signs require immediate medical attention and delay dental treatment. The head injury takes precedence over dental injuries because brain injury complications are life-threatening while dental problems are not. Signs of concussion include: loss of consciousness at any point, even briefly; confusion about what happened or where they are; repeated vomiting (once may be from swallowed blood, but multiple episodes suggest brain injury); severe headache that worsens rather than improves; vision changes or double vision; unequal pupil sizes; weakness or numbness in arms or legs; slurred speech or difficulty understanding questions; unusual sleepiness or difficulty waking; behavioral changes or unusual irritability; loss of balance or difficulty walking; and seizures at any point.
The “wait and watch” danger applies to seemingly minor trauma. Some serious injuries do not show immediate symptoms. Tooth root fractures may not cause pain initially but lead to infection weeks later. Pulp damage from impact sometimes takes days to weeks before causing symptoms. Bone fractures occasionally become apparent only after initial swelling subsides. Internal tooth resorption (the tooth destroys itself from inside) can begin months after trauma and show no early symptoms.
Trauma Treatment Options at the Clinic (Repair, Stabilize, Save the Tooth)
Clinical treatment for dental trauma aims to restore function, eliminate pain, preserve tooth vitality when possible, and achieve acceptable aesthetics. The chosen approach depends on injury type, tooth type (baby or permanent), patient age, and injury severity.
Fixing Broken Teeth: Bonding, Fragment Reattachment, and When Crowns Are Needed
Fractured teeth receive different treatments based on fracture depth, fragment availability, tooth type, and cosmetic expectations.
Composite bonding rebuilds small to moderate fractures. The dentist cleans the fractured surface, applies bonding agent (adhesive), sculpts tooth-colored composite resin to restore natural contour, hardens the material with curing light, and shapes and polishes to match adjacent teeth. The procedure takes 30–60 minutes per tooth and requires no anesthesia for simple enamel chips. Deeper fractures exposing dentin require local anesthesia because dentin contains sensitive nerve fibers.
Bonding works well for front teeth where aesthetics matter. The composite color matches natural tooth shade precisely. Modern materials achieve excellent strength and last 5–10 years with proper care. However, bonding is more fragile than natural enamel, children should avoid chewing hard objects (ice, hard candy, pen caps) with bonded teeth. The bonding may stain over time from foods and drinks, requiring periodic replacement.
Fragment reattachment offers superior aesthetics when the broken piece is available. The dentist tests fragment fit, cleans both the tooth and fragment surfaces, applies bonding agent to both surfaces, positions the fragment precisely, hardens the bond with curing light, and removes excess material and polishes the junction line. This technique preserves the tooth’s original anatomy, translucency, and color better than synthetic composite. Success requires an intact fragment with clean break lines and treatment within 24–48 hours before fragment dehydration or contamination.
Fragment reattachment fails when: the fragment is lost, contaminated beyond cleaning, or has multiple small pieces. The fracture line extends below the gum line where bonding cannot achieve isolation from moisture. Delayed presentation causes fragment shrinkage that prevents precise fit. These situations require conventional composite bonding instead of fragment reattachment.
Crowns become necessary for large fractures removing more than 50% of the tooth structure. The remaining tooth is too weak to support a filling or bonding, chewing forces would cause additional fracture. Understanding when dental crowns are needed, the types available, their lifespan, and cost helps families prepare for this step. The dentist removes additional tooth structure to create proper crown shape, takes impressions or digital scans, places a temporary crown, fabricates the permanent crown, cements it, and adjusts the bite. The process takes 1–2 weeks for laboratory crowns or 2–3 hours for same-day milled crowns.
Crown material selection depends on tooth location and patient age. Stainless steel crowns for baby teeth provide durability at low cost and last until natural exfoliation. Ceramic or zirconia crowns for permanent front teeth offer excellent aesthetics but cost significantly more. Porcelain-fused-to-metal crowns for permanent back teeth balance strength and appearance. The crown protects the weakened tooth permanently and functions like a natural tooth after proper adjustment.
Fractures exposing pulp tissue require nerve protection before restoration. Small pulp exposures (less than 1–2 mm) in recently injured teeth may receive direct pulp capping, placing medication directly on the exposed nerve, sealing with filling material, and monitoring for healing. This preserves tooth vitality in some cases. Large pulp exposures or delayed treatment typically require pulpotomy (removing crown pulp) or root canal treatment (removing all pulp). The dentist then restores the tooth with filling or crown after nerve treatment.
Treatment success depends partially on post-procedure care. Children should avoid biting hard objects with treated teeth for 24–48 hours while bonding materials achieve maximum strength. Soft diet for 1–2 days reduces stress on repairs. Cold sensitivity may persist for days to weeks as the tooth adjusts, this usually resolves spontaneously. Pain requiring medication suggests complications requiring dentist contact.
In Kathmandu, composite bonding costs NPR 3,500–6,000 per tooth for moderate fractures. Ceramic crowns on permanent front teeth range from NPR 12,000–25,000 depending on material quality and laboratory. Fragment reattachment is typically priced similar to bonding. Parents should discuss costs before treatment, as trauma often involves treating multiple teeth simultaneously.
Loose/Displaced Teeth: Repositioning, Splinting, and Bite Protection During Healing
Loose or displaced teeth require careful repositioning and stabilization to allow the surrounding ligament and bone to heal while maintaining proper tooth position.
Mildly loose teeth (slight mobility with no displacement) often need only soft diet and monitoring. The periodontal ligament (tissue connecting tooth root to bone) has become inflamed and partially torn from impact but will heal naturally in 2–3 weeks. Parents should provide soft foods that require minimal chewing (rice with dal, yogurt, mashed potatoes, bananas, soft bread). Avoid hard, crunchy, or chewy foods (nuts, raw vegetables, tough meat, hard cookies). The child should not bite directly with the injured tooth but may use it for gentle holding while back teeth do the chewing.
Touch and press the tooth gently each day to assess mobility. Increasing mobility or development of pain suggests healing problems requiring dental evaluation. Decreasing mobility indicates normal healing. Most mild luxation injuries resolve completely without intervention beyond diet modification.
Moderately to severely loose teeth require splinting for healing. The dentist repositions the tooth to its correct location (may require local anesthesia), bonds a flexible wire or composite across the injured tooth and adjacent stable teeth, verifies proper bite alignment, adjusts as needed, and schedules splint removal in 1–4 weeks depending on injury severity.
Flexible splints allow some tooth movement during healing, which promotes better ligament regeneration than rigid fixation. The splint prevents gross displacement while permitting micro-movement. Children can eat soft foods carefully while splinted but must avoid testing the injured tooth deliberately.
Displaced teeth require urgent repositioning. Laterally displaced teeth (pushed forward, backward, or sideways) need manual repositioning by the dentist under anesthesia within hours of injury. The dentist grasps the tooth with forceps, applies firm pressure to move it back to normal position, verifies correct alignment visually and with X-rays, splints the tooth to adjacent teeth, and monitors healing. Delays beyond 24 hours make repositioning difficult because blood clots and swelling develop in the displaced space.
Intruded teeth (driven into the jawbone) receive different management based on root development. Baby teeth with incomplete root formation often re-erupt naturally over 2–6 months without intervention. Monitoring with periodic X-rays and clinical examination is typically sufficient. Permanent teeth with incomplete roots also may re-erupt naturally but require careful monitoring. Permanent teeth with fully formed roots rarely re-erupt spontaneously, these need orthodontic extrusion (pulling the tooth back out with braces or wires over weeks to months). Severely intruded teeth causing bone damage sometimes require surgical repositioning.
Extruded teeth (partially out of socket) require repositioning and splinting immediately. The dentist numbs the area, pushes the tooth back into its socket, splints to adjacent teeth, and monitors for healing or complications. Extrusive luxation damages the tooth’s blood supply, so root canal treatment is often necessary weeks to months after the injury, even in teeth that appear to heal successfully.
Bite adjustment becomes critical during healing. The splinted or repositioned tooth must not contact opposing teeth during biting. Even slight premature contact during chewing can prevent healing or cause additional damage. The dentist adjusts the tooth’s biting surface slightly, removing small amounts of enamel from high spots. Parents should verify that the child bites evenly on all teeth, if the injured tooth contacts first, schedule an adjustment appointment.
Healing expectations and complications to monitor: Week 1-2: Tooth firmness improves as initial inflammation resolves. Mild sensitivity is normal. Weeks 2-4: Mobility should decrease significantly. Persistent or increasing mobility suggests healing failure. Months 1-6: Color changes may appear as the tooth’s blood supply recovers or fails. Darkening teeth require root canal evaluation. Months 6-12 and beyond: Late complications include root resorption (body slowly dissolves the root), ankylosis (tooth fuses to bone and stops growing with jaw), or infection requiring root canal or extraction.
Soft diet duration depends on injury severity. Mild luxation: 1–2 weeks of soft diet. Moderate luxation with splinting: 2–4 weeks of soft diet. Severe displacement with repositioning: 4–6 weeks of soft diet. Intruded teeth: soft diet until re-eruption is confirmed (months in some cases). The goal is to protect the healing ligament from excessive forces that could disrupt repair.
Sports and physical activity restrictions typically last 4–6 weeks after splint removal for significant injuries. Contact sports, rough play, and activities with falling risk should be avoided during healing. Children may resume normal activities once the dentist confirms adequate healing and the tooth is no longer mobile.
When Trauma Reaches the Nerve: Pulp Treatment, Root Canal, or Extraction Decisions
Injuries exposing the tooth pulp or causing pulp damage through concussion create decisions about nerve treatment. These choices significantly affect the tooth’s long-term survival and function.
Immediate pulp exposure (visible pink/red tissue at fracture site) requires urgent care to preserve vitality. Small exposures (less than 1 mm) treated within hours may receive vital pulp therapy, the dentist places medication directly on the exposed nerve tissue, seals with biocompatible material, places a filling or crown, and monitors for healing. Success rates reach 80–90% for small exposures treated immediately.
Delayed treatment or large exposures (more than 2 mm) rarely preserve pulp vitality. Bacteria colonize the exposed pulp within hours, causing irreversible inflammation and eventual necrosis. These situations require pulpotomy or full pulpectomy to remove infected tissue and prevent abscess formation.
Pulpotomy (partial pulp removal) works for baby teeth and some young permanent teeth. The dentist removes pulp tissue from the tooth crown, leaving root pulp intact, applies medicament to the remaining pulp, seals the access opening, and places a crown for protection. The procedure allows baby teeth to function normally until natural exfoliation. Success rate exceeds 85% for appropriately selected cases.
Pulpotomy is not appropriate for: teeth showing X-ray evidence of root infection; teeth with severe pain suggesting complete pulp necrosis; teeth with draining abscess; permanent teeth with fully formed roots (these require full root canal); or teeth that will exfoliate within 6 months (extraction may be more appropriate).
Root canal treatment (pulpectomy) removes all pulp tissue from crown and roots. The dentist creates access through the tooth crown, locates all root canals (back teeth have 3–4 canals, front teeth have 1–2), removes infected and healthy pulp tissue completely, cleans and shapes canals with files, disinfects with medicinal solutions, fills canals with biocompatible material (usually gutta-percha), seals the access opening, and restores the tooth with filling or crown. The procedure preserves the tooth structure while eliminating infection source.
Root canal treatment requires 1–2 hours for front teeth with single canals and sometimes 2–3 hours for back teeth with multiple canals. Some complex cases need multiple appointments separated by 1–2 weeks. Children aged 8–12 often need two appointments because cooperation for extended procedures is challenging. Teenagers can typically complete treatment in one longer visit.
Success rates for root canal treatment in permanent teeth exceed 90% with proper technique and post-treatment care. Treated teeth become slightly more brittle than vital teeth but can last the patient’s lifetime with crown protection on back teeth. Front teeth with root canal treatment often last decades with only the initial bonding or crown restoration.
Extraction becomes necessary when teeth cannot be saved or treatment costs exceed benefits. Indications for extraction include: severe crown fracture destroying too much tooth structure for crown placement; root fracture near the crown with no salvageable root length; extensive bone loss around the root from infection; economic factors when root canal plus crown costs exceed family resources significantly; medical conditions making prolonged dental treatment high-risk; or baby teeth within 6–12 months of natural exfoliation.
Post-extraction decisions depend on which tooth was lost. Baby tooth extraction may require a space maintainer to prevent adjacent tooth drift (typically necessary for molars lost more than 1 year before expected exfoliation). Permanent tooth extraction creates gaps requiring eventual replacement with implants, bridges, or orthodontic space closure, and understanding how implants compare to dental bridges helps set realistic timelines and budgets. Young patients (under age 18–20) cannot receive implants until jaw growth completes, so temporary partial dentures or other interim solutions may be needed for years.
Pain management after nerve treatment is usually straightforward. Most patients experience mild discomfort managed with ibuprofen for 2–3 days. Severe pain after root canal treatment suggests inadequate cleaning, missed canal, or persistent infection requiring retreatment. The tooth should gradually become less sensitive and comfortable within one week.
Long-term monitoring remains essential after any pulp treatment. X-rays at 3 months, 6 months, and yearly thereafter detect healing problems before symptoms develop. Some treated teeth develop root resorption months to years later despite proper initial treatment. Root canal failures show on X-rays as persistent or expanding dark areas around root tips, indicating infection that did not resolve.
In Kathmandu, root canal treatment costs NPR 9,800–16,000 per tooth depending on tooth location and case complexity. Crown costs add NPR 8,000–25,000 depending on material. These combined costs make some families choose extraction (NPR 2,000–4,000) instead, accepting future orthodontic or replacement needs. Dentists should present realistic treatment costs upfront, allowing families to make informed choices without financial surprises.
Aftercare & Follow-Up: Soft Diet, Hygiene, Infection Warning Signs, Long-Term Monitoring
Recovery from dental trauma extends well beyond the initial treatment appointment. Proper aftercare and vigilant monitoring detect complications early and maximize treatment success.
Soft diet duration and guidelines vary by injury type. Minor enamel chips: no diet restriction after bonding. Moderate fractures with bonding: avoid hard/sticky foods for 48 hours, then resume normal diet. Loose teeth without splinting: soft diet for 2–3 weeks, gradually advancing as mobility decreases. Splinted teeth: soft diet throughout splinting period plus 1 additional week after splint removal. Root canal treated teeth: soft diet for 24–48 hours post-treatment, then normal diet unless awaiting crown placement.
Soft food examples appropriate for children include: rice and dal; khicdi; momos (if not chewy); soft roti with curry; yogurt and milk products; mashed potatoes; bananas and soft fruits; well-cooked vegetables; soups and broths; eggs prepared soft; fish; soft meat curries; puddings and soft desserts; pasta; and oatmeal or rice porridge. Foods to avoid during healing include: nuts and seeds; hard cookies or biscuits; raw vegetables (carrots, radish); tough meat (buff or tough chicken); hard fruits (apples, guava); sticky candy or gum; ice or ice cubes; hard bread crusts; popcorn; and chewing on bones.
Oral hygiene must continue despite discomfort. Many children and parents avoid brushing injured areas, allowing plaque accumulation that causes gum inflammation and increases infection risk. The proper approach includes: continuing to brush all teeth twice daily, being gentle but thorough around injured areas, using a soft-bristled brush that causes less trauma, rinsing gently with warm salt water (half teaspoon salt in one cup warm water) after meals, avoiding vigorous spitting or rinsing that might dislodge blood clots or disturb healing, and using prescribed mouthwash if the dentist provides one.
Splinted teeth require extra care because the wire and bonding create plaque traps. Parents should supervise cleaning, ensuring the child brushes above and below the splinting wire. Interdental brushes or water flossers help clean around splint materials when traditional floss cannot access the space.
Infection warning signs require immediate dental contact: Swelling developing or worsening 3+ days after injury or treatment, early swelling is normal, but increasing swelling suggests infection. Fever above 38°C (100.4°F) appearing days after dental trauma. Pus or thick yellow/white discharge from the gum near the treated tooth. A bump or pimple appearing on the gum near the tooth root, this is a draining fistula indicating abscess. Increasing pain rather than gradually improving pain after the first 2–3 days. Foul taste or smell localized to the treated area. Tooth becoming darker or discolored weeks after trauma, indicates pulp necrosis. Increased tooth mobility developing days to weeks after initial improvement, suggests healing failure.
Parents sometimes confuse normal healing symptoms with infection signs. Normal post-treatment experiences include: mild swelling for 2–3 days after trauma or treatment, gradually decreasing; mild sensitivity to cold or pressure for 1–2 weeks, slowly improving; slight gum tenderness around the treated tooth; and mild discomfort when eating that improves daily. These normal symptoms do not require emergency contact but should be mentioned at follow-up appointments if persistent.
Follow-up appointment schedule typically includes: Week 1-2: Initial recheck to verify healing progress, assess bite, remove or adjust splint if needed. Week 3-4: Splint removal for most cases, radiographic evaluation, assess tooth color and mobility. Month 3: Clinical and radiographic evaluation to detect early root resorption or pulp necrosis. Month 6: Repeat evaluation, especially important for permanent teeth. Month 12: Yearly evaluation continues for at least 3–5 years after significant trauma. Growing children need monitoring until jaw growth completes to detect ankylosis or other growth-related complications.
Long-term complications may appear months to years after seemingly successful initial healing. Root resorption (internal or external) causes progressive tooth structure loss visible on X-rays. External resorption can sometimes be arrested with root canal treatment. Internal resorption discovered early may respond to treatment, but advanced cases require extraction. Ankylosis (tooth fuses to bone) creates a tooth that appears to sink below adjacent teeth as the jaw grows while the ankylosed tooth does not. This complication affects children under age 14 most commonly.
Insurance and cost implications of long-term trauma monitoring: Initial trauma treatment may be covered partially or fully by insurance depending on policy specifics. Long-term follow-up X-rays and appointments incur additional costs over years. Some dentists include 6–12 month follow-up in initial trauma treatment fees; others charge for each visit. Parents should clarify follow-up cost expectations at the initial visit. Delayed complications like root canal needs months after trauma typically incur separate treatment fees. Root resorption or ankylosis in permanent teeth may eventually require extraction and implant placement (NPR 60,000–130,000 in Kathmandu) years after the original injury.
The most important aftercare message is this: dental trauma is never “finished” after immediate treatment. Vigilant monitoring over months to years detects complications while they remain manageable. Missing follow-up appointments or assuming all is well because the tooth stops hurting can lead to preventable tooth loss or complex problems requiring expensive treatment later. Families seeking trusted, child-friendly care can find experienced providers through Dental in Kathmandu to establish the long-term monitoring relationship your child needs.
Prevention Plan (Daily Habits, Clinic Prevention and Practical Costs)
Prevention is the foundation of effective childhood dental care. The following evidence-based strategies significantly reduce cavity and trauma risk while remaining practical for busy Kathmandu families.
Brushing by Age: Fluoride Toothpaste Amount, Technique, and Parent Supervision Tips
Proper brushing prevents most childhood cavities, but technique and supervision matter more than brushing frequency alone.
Fluoride toothpaste amounts by age: Ages 0-3 years (first tooth through age 2): rice grain-sized smear (approximately 0.1 mg fluoride). Ages 3-6 years: pea-sized amount (approximately 0.25 mg fluoride). Ages 6+ years: pea to small bean-sized amount (approximately 0.3–0.5 mg fluoride). These amounts provide decay prevention while minimizing fluoride ingestion that could cause dental fluorosis if excessive.
Brushing technique for parents to teach and supervise: Position the toothbrush at a 45-degree angle where teeth meet gums. Use gentle circular motions rather than hard back-and-forth scrubbing, aggressive brushing damages gums and enamel. Brush all surfaces: outer (cheek side), inner (tongue side), and chewing surfaces. Spend at least 2 minutes total, many children rush through brushing in 20–30 seconds, missing most surfaces. The 2-minute guideline ensures adequate coverage.
Age-specific brushing guidance includes these practical approaches:
- Ages 0-3: Parent performs all brushing, child sits on lap or stands between parent’s knees facing away, parent uses finger brush or soft infant toothbrush, two times daily (after breakfast and before bed).
- Ages 3-6: Parent brushes thoroughly, then allows child to practice independently, parent verifies all surfaces were cleaned, establishes routine of brushing chart or reward system for consistency, two times daily minimum.
- Ages 6-10: Child brushes independently with parent watching, parent checks inside the mouth with flashlight to verify cleanliness, parent may need to re-brush areas the child missed, two times daily minimum plus optional after lunch at school if feasible.
- Ages 10+: Direct supervision decreases but parent continues periodic verification, focus shifts to building lifelong habits and intrinsic motivation, two times daily minimum plus after sugary snacks when possible.
Common brushing mistakes to avoid: Brushing immediately after consuming acidic foods or drinks, this scrubs weakened enamel. Wait 30–60 minutes or rinse with water first. Using too much toothpaste, children are tempted by the foam and flavor but excess provides no benefit and increases fluoride swallowing. Replacing the toothbrush too infrequently, bristles become frayed and ineffective after 3 months or sooner with heavy use. Neglecting the tongue, bacteria accumulate on the tongue surface, causing bad breath and recolonizing teeth after brushing. Brushing for only 15–30 seconds, this is insufficient time to clean all surfaces.
Special situations requiring adjusted technique: Orthodontic braces: brush above and below brackets, use interdental brushes for wire areas, consider water flosser, and brush after every meal if possible. Erupting permanent molars: these teeth sit partially below gum level for months, making them difficult to clean. Pay extra attention with angled brushing to reach back surfaces. Sensitive teeth: use soft-bristled brush, gentle pressure, and consider desensitizing toothpaste. Children with special needs: adapt positioning, tools (three-sided brush, electric brush), and expectations to individual capability.
Electric vs. manual toothbrush considerations: Electric toothbrushes remove more plaque with less technique than manual brushes, a significant advantage for children with poor manual dexterity or motivation. They make brushing more fun for many children through timers, music, or app features that encourage 2-minute brushing. However, they cost significantly more (NPR 2,500–8,000 in Kathmandu) and require replacing heads every 3 months. Manual brushes (NPR 150–400) work equally well with proper technique and supervision. The choice depends on family budget and what motivates consistent brushing in your child.
Fluoride toothpaste selection in Kathmandu: Most international brands (Colgate, Sensodyne, Pepsodent) available in Kathmandu contain adequate fluoride (1,000–1,450 ppm). Check the ingredient list for sodium fluoride, sodium monofluorophosphate, or stannous fluoride. Avoid “natural” or “herbal” toothpastes that may lack fluoride entirely, these provide minimal decay prevention. Children’s toothpastes with cartoon characters usually contain appropriate fluoride concentrations and acceptable flavors. Teenagers can use adult toothpastes; there is no difference in fluoride content.
How often should my child see a dentist?
Children should see a dentist every 6 months if they are low-risk, every 3 months if they have a high risk for cavities, within 6 months of their first tooth erupting, and immediately after any dental trauma.
Should I choose a pediatric dentist or general dentist?
Choose a pediatric dentist for anxious children, kids under age 4, or those with special healthcare needs. Choose a general dentist for routine care if accessibility is a priority, especially in areas like Kathmandu with fewer pediatric specialists.
Is sedation safe for children?
Sedation is safe for children when used properly. Nitrous oxide is very safe and wears off quickly. Oral sedation is safe with trained providers. General anesthesia is safe in hospitals for healthy children needing extensive treatment or with severe anxiety.
My child has cavities on baby teeth that will fall out soon, should we still treat them?
Treat baby teeth if they will remain for more than a year or cause pain or infection. Teeth falling out within 6 months may not need treatment unless symptomatic. Use X-rays to guide treatment decisions with your dentist.
What age should my child start flossing?
Start flossing when any two teeth touch, usually around age 2–3. Parents should floss for children until age 10 when motor skills develop. Floss daily for best results or at least 3–4 times weekly for significant benefit.
Are X-rays safe for children?
Dental X-rays are safe for children when digital systems are used. Radiation exposure is lower than a 2-hour flight. Dentists use protective aprons and collars. The benefit of detecting hidden problems outweighs the minimal radiation risk.
My child refuses to brush, what should I do?
Enforce brushing like any non-negotiable routine. Offer choices in brush and toothpaste. Use songs, timers, and rewards to build cooperation. Brush together as a family. If resistance continues, consult your dentist about behavior strategies.
How do I choose a good dentist in Kathmandu?
Choose a good dentist in Kathmandu by checking cleanliness, visible sterilization methods, staff friendliness, and dentist qualifications. Ask for treatment costs and emergency contact options. Trust your instincts if the clinic feels rushed or unclean.
What if my child has special healthcare needs?
Start with your current dentist for special needs care. If they can’t accommodate, seek dentists with special needs training. Teaching Hospital in Kathmandu has experienced providers. Communicate needs clearly, including triggers and successful strategies.
What do I do if treatment costs exceed our budget?
Discuss costs early with your dentist. Prioritize urgent care and delay less critical procedures. Use government hospitals for affordable care. Ask about payment plans for large treatments. Focus on prevention to reduce long-term costs.
BrightSmile Dental Clinic in Putalisadak welcomes families seeking patient-friendly, comprehensive care at fair pricing. Contact us at +977-9748343015 or brightsmileclinic33@gmail.com to schedule your child’s preventive visit or discuss any dental concerns. We provide transparent cost estimates, flexible appointment scheduling, and emergency care when needed. Building a dental home relationship with your family helps us provide personalized care that fits your specific needs and circumstances.