
Teeth whitening has become one of the most requested cosmetic dental treatments in Kathmandu, with patients seeking brighter smiles for weddings, professional photos, and personal confidence. The market offers everything from DIY remedies shared on social media to professional in-office treatments, creating confusion about which methods actually work and which might damage your teeth permanently.
Understanding the difference between safe home methods and professional treatments helps you make informed decisions that protect your enamel while achieving realistic results. This guide breaks down what works, what doesn’t, and when professional help becomes necessary.
What Teeth Whitening Really Means (and What “Natural” Can’t Do)

Understanding the science behind teeth whitening helps you separate marketing promises from realistic outcomes. Most “natural” methods only remove surface debris rather than changing your tooth color, while professional treatments use chemical bleaching agents that penetrate enamel to lighten internal discoloration. Knowing what whitening can and cannot do, and who should avoid it entirely, prevents wasted money, damaged enamel, and dangerous complications that require costly repairs.
Whitening vs bleaching: what dentists mean by each
Whitening refers to removing surface stains to restore your teeth to their natural color. This includes brushing away coffee rings, polishing off tea deposits, and eliminating external discoloration. Bleaching goes deeper, it uses peroxide-based chemicals to change the internal tooth color beyond its natural shade.
The distinction matters for setting realistic expectations. A whitening toothpaste can remove the brown film from your morning tea, but it cannot lighten teeth that are naturally yellowish or have aged over time. Bleaching products contain hydrogen peroxide (3% to 40%) or carbamide peroxide (10% to 44%) that penetrate enamel and break apart colored molecules inside the tooth structure.
Most “natural whitening” methods only clean surface stains. They fall into the whitening category, not bleaching. You cannot achieve the dramatic shade change shown in advertisements without chemical bleaching agents.
Surface stains vs internal discoloration: how to tell which you have
Surface stains appear as brown, yellow, or orange deposits on the outer enamel layer. Run your tongue across your teeth after drinking black coffee, the rough, slightly sticky feeling indicates surface accumulation. These stains respond well to professional cleaning and whitening toothpastes.
Internal discoloration lives inside the tooth structure itself. Your teeth appear uniformly yellow, gray, or brown rather than showing specific stained spots. This type of discoloration comes from aging (enamel thins and reveals the yellow dentin underneath), childhood antibiotic use (tetracycline), excessive fluoride during tooth development, or trauma that damaged the tooth’s internal blood supply.
A simple test helps identify your stain type. Brush thoroughly and rinse for 30 seconds with water. Surface stains appear darker or more pronounced when wet. Internal discoloration looks the same whether teeth are wet or dry. Most Kathmandu patients have a combination of both stain types, which is why professional assessment matters before choosing a whitening method.
Who should NOT whiten first: cavities, gum issues, exposed roots, heavy sensitivity
You should delay whitening treatments if you have untreated dental problems. Whitening gel penetrates cavities and reaches the tooth’s nerve, causing sharp pain and potentially damaging the pulp. The pain differs from normal sensitivity, it feels like an electric shock that makes you jump.
Gum disease creates pockets where whitening chemicals pool and burn soft tissue. Patients describe this as a persistent stinging that worsens over hours, not minutes. Active gingivitis and gum disease, from bleeding when you brush to periodontitis with loose teeth and receding gums, requires treatment before any whitening procedure.
Exposed roots lack the protective enamel layer found on tooth crowns. Root surfaces are made of dentin, which has tiny tubules that lead directly to the nerve. Applying whitening gel to exposed roots triggers intense sensitivity that can last for days. We see this frequently in Kathmandu patients over 40 who have gum recession from aggressive brushing.
Heavy sensitivity from cold drinks or sweet foods indicates compromised enamel or exposed dentin. Whitening will amplify this sensitivity to unbearable levels. Address the underlying cause first, whether it’s enamel erosion, a cracked tooth, or gum recession.
BrightSmile Dental Clinic requires a clinical examination before any whitening treatment to identify these issues. The examination costs NPR 500 and includes X-rays if needed to rule out hidden cavities.
Restorations don’t whiten: fillings, crowns, veneers and how to plan around them
Dental restorations stay their original shade regardless of whitening treatments. The composite resin in fillings, the porcelain in crowns, and the ceramic in veneers do not respond to bleaching chemicals. You will end up with a mismatched smile, bright natural teeth next to unchanged restorations.
This creates a planning challenge. You have three main options: firstly, whiten your natural teeth first, then replace visible restorations to match the new shade; secondly, accept the color difference if restorations are only on back teeth; thirdly, skip whitening and replace front restorations with brighter versions instead.
The timing matters financially. Composite fillings cost NPR 2,000 to 5,000 per tooth in Kathmandu. Replacing three or four front fillings after whitening adds NPR 8,000 to 20,000 to your total cost. Factor this into your budget before starting treatment.
We see many patients who whitened first without considering their front fillings. Their natural teeth brightened three shades, but the old composite filling in the front tooth stayed dark yellow. They end up paying for both whitening and a filling replacement, something that could have been planned together from the start.
Safe Natural “Whitening” at Home (Evidence-Based Habits)
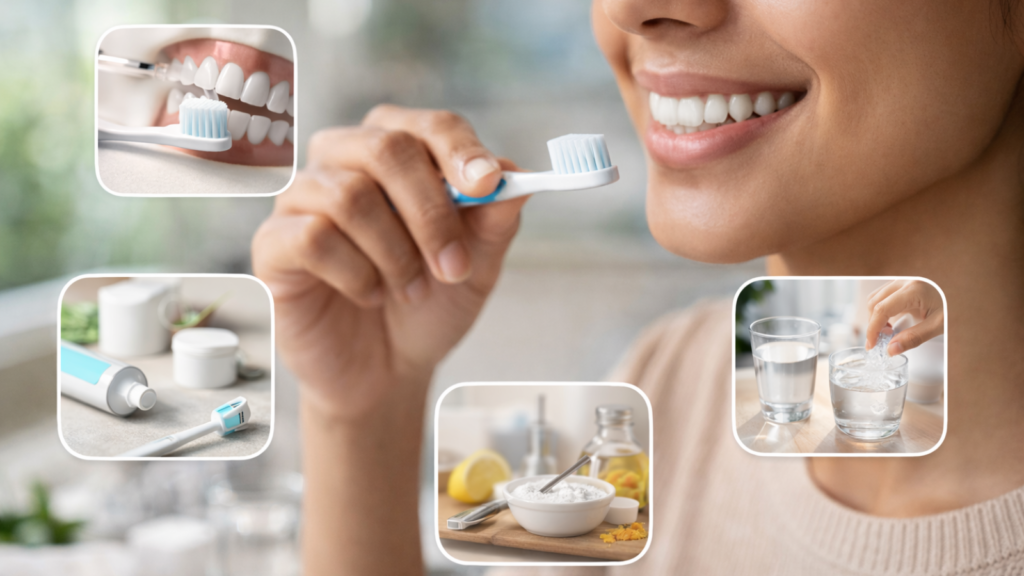
The most effective natural brightening comes from preventing stains before they bond to your enamel, not from DIY remedies promoted on social media. Simple habit changes, proper brushing technique, strategic timing of coffee and tea consumption, and evidence-based use of baking soda, control surface discoloration without chemicals or costs. These methods cannot bleach teeth lighter than their natural shade, but they maintain baseline brightness and extend professional whitening results for months longer than average.
1. The #1 natural brightening method: professional-level cleaning habits (stain control)
Proper brushing technique prevents 70% to 80% of surface staining before it bonds to enamel. Most Kathmandu patients brush too quickly, 45 seconds instead of the recommended 2 minutes, and miss the areas where stains accumulate fastest: behind lower front teeth, along the gum line, and between molars.
The technique that prevents staining differs from quick scrubbing. Angle your brush at 45 degrees toward the gum line and use small circular motions for 10 to 15 seconds per tooth section. This lifts fresh stain deposits before they mineralize and harden. Morning brushing removes overnight bacterial film; nighttime brushing clears the day’s tea, coffee, and food pigments.
Flossing removes the 30% to 40% of stain-catching surface area that brushing cannot reach. The tight contacts between teeth trap food particles and colored liquids. These particles oxidize and darken within 24 to 48 hours. Daily flossing interrupts this process and prevents the brown shadowing that makes teeth look dull.
Professional cleaning every 6 months removes calcified deposits that at-home brushing cannot eliminate. BrightSmile Dental Clinic includes stain polishing with every scaling appointment (NPR 2,500 to 3,000) to maintain baseline brightness between whitening treatments.
2. Stain prevention routine: tea/coffee timing, rinsing, straw habits, smoking triggers
Staining happens fastest in the first 30 minutes after consuming pigmented drinks. Tea tannins and coffee chromogens need time to penetrate enamel’s microscopic pores. Rinsing your mouth with water within 10 to 15 minutes after drinking reduces stain bonding by approximately 50% to 60% compared to waiting an hour.
Straws minimize liquid contact with front teeth. Position the straw toward the back of your mouth, behind your canines. This technique works particularly well for iced coffee and cold tea, the drinks Kathmandu’s younger professionals consume most frequently. Hot beverages are harder to drink through straws, so the rinsing protocol becomes more important.
Smoking creates some of the most stubborn stains dentists encounter. Tobacco tar embeds into enamel within minutes and builds up in layers over weeks. The stains appear brown to black and concentrate on the tongue-facing surface of lower front teeth. Quitting smoking remains the only permanent solution, no whitening treatment can keep pace with active smoking’s staining rate.
Adding milk to tea or coffee provides casein proteins that bind to tannins before they reach your teeth. We notice that patients who drink milk tea (chiya) have less staining than those who drink black tea, assuming both groups maintain similar brushing habits. The protective effect is modest but measurable over months.
3. Baking soda: when it can help, safe frequency, and what to never mix it with
Baking soda (sodium bicarbonate) removes surface stains through mild abrasion and chemical neutralization. Its grainy texture polishes away soft deposits, while its alkaline pH breaks down acidic stain compounds. Studies show that toothpastes containing baking soda remove more surface stains than those without it.
Safe usage means applying it no more than 2 to 3 times per week. Mix half a teaspoon of baking soda with enough water to form a paste. Brush gently for 60 to 90 seconds, focusing on stained areas. Daily use risks abrading enamel over months, particularly on patients with naturally thin enamel or existing erosion.
Never mix baking soda with acidic substances like lemon juice, vinegar, or hydrogen peroxide for “enhanced whitening.” The acid-base reaction fizzes impressively but erodes enamel faster than baking soda alone. The temporary brightness you see comes from removing a microscopic enamel layer, not from true whitening. Your teeth become more porous and stain faster afterward.
Baking soda does not replace fluoride toothpaste. Alternate baking soda days with regular fluoride toothpaste to maintain cavity protection. Some Kathmandu patients use baking soda exclusively and develop multiple cavities within a year, fluoride strengthens enamel against acid attacks that baking soda does not prevent.
4. “Natural” trend check: oil pulling/turmeric and what they may help vs what they won’t whiten
Oil pulling involves swishing coconut or sesame oil for 10 to 20 minutes daily. Proponents claim it whitens teeth by “pulling out” toxins and bacteria. The practice may reduce plaque buildup and gingivitis by mechanically removing bacteria, similar to how mouthwash works. However, oils do not contain bleaching agents and cannot change internal tooth color.
Any perceived whitening from oil pulling comes from reduced plaque and surface debris. Your teeth look cleaner, not genuinely lighter. Studies comparing oil pulling to chlorhexidine mouthwash show similar plaque reduction but no measurable shade change on standardized whitening scales.
Turmeric paste (mixed with coconut oil) circulates on social media as a natural whitener. Turmeric’s bright yellow color creates an optical illusion, the yellow contrasts with teeth and temporarily makes them appear whiter by comparison. The effect disappears within hours. More concerning, turmeric can stain porous enamel or existing composite fillings yellow-orange, requiring professional polishing to remove.
Neither oil pulling nor turmeric addresses internal discoloration, age-related yellowing, or the type of stains that create actual cosmetic concern. They work as supplemental hygiene practices, not as substitutes for evidence-based whitening treatments. Patients who spend months on these methods often feel frustrated when professional assessment reveals their baseline tooth color has not changed.
DIY Whitening Hacks to Avoid (They Can Damage Enamel)
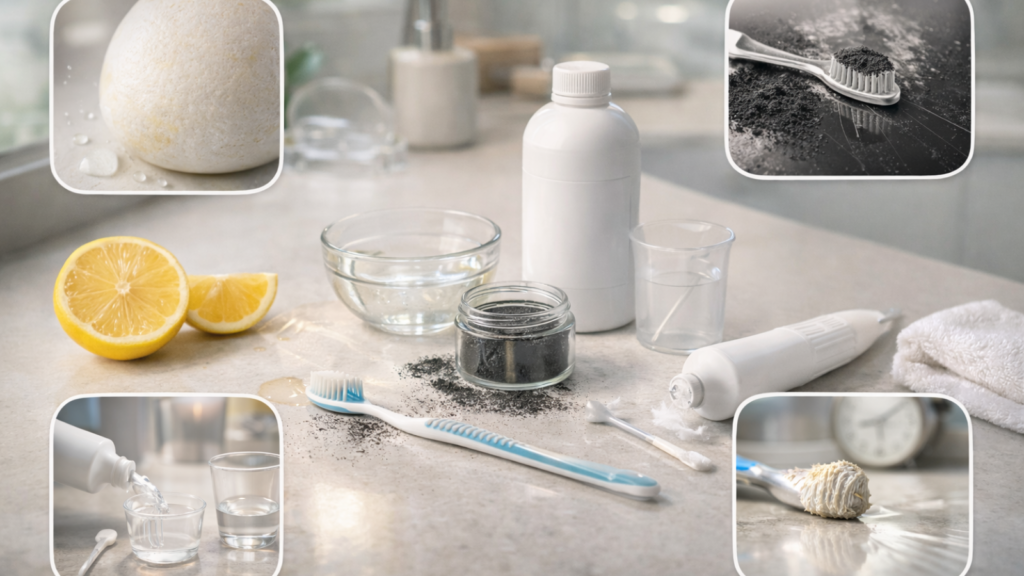
Popular internet whitening “hacks” often cause more harm than the stains they claim to remove. Acidic substances like lemon juice and vinegar dissolve enamel permanently, while abrasive charcoal powders create microscopic scratches that trap stains faster than before. Understanding why these methods damage teeth, and seeing the expensive restoration costs they trigger, helps you avoid irreversible harm disguised as natural beauty solutions.
1. Acid methods (lemon/vinegar/apple cider): why they erode enamel and worsen yellowing
Citric acid from lemons and acetic acid from vinegar dissolve enamel’s mineral structure. Enamel is composed of calcium hydroxyapatite crystals. Acids below pH 5.5 demineralize these crystals, creating microscopic pits and roughening the surface, the same mechanism behind acid reflux–related enamel erosion. The damage begins within 2 to 3 minutes of acid contact.
The whitening illusion comes from etching away the outer enamel layer that holds stains. Your teeth appear temporarily brighter because you have removed the discolored surface. However, the newly exposed enamel is softer and more porous, it absorbs stains faster than before. Within 2 to 3 weeks, teeth often look yellower than the starting point.
Repeated acid exposure thins enamel progressively. Your teeth become translucent at the edges, show increased sensitivity to temperature, and reveal the yellow dentin layer underneath. This damage is permanent. Enamel cannot regenerate or repair itself the way bone or skin can.
We have treated Kathmandu patients who used lemon-baking soda mixtures daily for months. Their front teeth showed advanced erosion, cupped biting edges, visible dentin, and severe sensitivity to cold air. Restoring these teeth required composite bonding or veneers costing NPR 8,000 to 25,000 per tooth. The “free” home remedy cost significantly more than professional whitening (NPR 15,000 to 22,000) would have.
2. Activated charcoal powders: abrasion risks and uneven shade outcomes
Activated charcoal’s abrasiveness removes surface stains through mechanical scrubbing. The powder consists of fine carbon particles with irregular sharp edges. These edges physically scrape off the outer enamel layer along with any attached stains. The relative dentin abrasivity (RDA) of charcoal powders often exceeds 200, compared to 70 to 150 for regular toothpaste.
Studies measuring enamel thickness before and after charcoal use show measurable loss over 30 to 60 days of daily application. The abrasion creates a rougher surface texture that catches stains more readily. Your teeth may look brighter for 1 to 2 weeks, then become duller than baseline as the roughened enamel accumulates new stains.
Uneven application creates patchy results. Areas you scrub vigorously, usually the front surfaces of upper incisors, become lighter. Areas you miss, between teeth, near gums, stay darker. The contrast makes teeth look spotted rather than uniformly white. Professional polishing can even out mild cases, but severe patchiness may require bleaching treatments to mask.
The black residue from charcoal lodges into microscopic cracks, old fillings, and the space where gums meet teeth. Patients report dark staining along their gum line that persists for days despite brushing. The particles also stain porous composite fillings permanently, requiring replacement to restore their original shade.
3. Random peroxide “recipes” and overuse: gum burns and sensitivity risks
Hydrogen peroxide sold in pharmacies for wound cleaning contains 3% peroxide concentration. DIY whitening recipes often instruct users to apply this directly to teeth for 5 to 30 minutes daily. Professional whitening gels use higher concentrations (15% to 40%) with buffering agents, thickeners, and desensitizers that protect soft tissue. Pharmacy peroxide lacks these protective ingredients.
Peroxide drips onto gums and burns the tissue within 10 to 15 minutes. The chemical burn appears as white, painful patches that take 3 to 7 days to heal. The pain interferes with eating and talking. More dangerous, repeated burns increase the risk of gum recession and create permanent tissue damage that exposes root surfaces.
Overuse means applying peroxide multiple times daily or leaving it on for extended periods. The peroxide penetrates enamel and reaches dentin, where it irritates the nerve endings in dentinal tubules. This triggers sensitivity that feels like sharp zingers when you breathe cold air or drink water. The sensitivity can persist for weeks after stopping treatment.
Swallowing peroxide causes stomach irritation, nausea, and vomiting at concentrations above 3%. We have seen patients who kept peroxide in their mouth for 20 to 30 minutes and accidentally swallowed small amounts. The resulting stomach pain sent them to emergency care, an avoidable outcome if they had used supervised whitening protocols.
4. Overbrushing/harsh scrubbing: micro-scratches that hold stains longer
Applying heavy pressure while brushing creates horizontal scratches across enamel. These scratches act like tiny grooves that trap food particles, bacteria, and pigments. The trapped debris oxidizes and darkens, making teeth appear discolored. The scratches are invisible to the naked eye but show clearly under magnification.
Most people brush with 300 to 400 grams of force. Dentists recommend 150 to 200 grams, about the weight of an orange. You can test your pressure by brushing the back of your hand; it should not turn red or feel uncomfortable. Electric toothbrushes with pressure sensors help train proper technique.
Harsh scrubbing wears down enamel at the gum line faster than on the tooth’s center. This creates V-shaped notches called abrasion cavities. The exposed dentin in these notches appears yellow and stains easily. Restoring these defects requires composite fillings, which do not whiten and may need replacement after bleaching treatments.
The staining paradox confuses patients. They brush harder because their teeth look yellow, which creates more scratches and worsens discoloration. The harder they brush, the darker their teeth become. Breaking this cycle requires switching to a soft-bristled brush, reducing pressure, and using whitening treatments to address existing stains rather than aggressive scrubbing.
At-Home Whitening That Actually Works (OTC vs Dentist-Supervised)
Over-the-counter whitening products and dentist-supervised home treatments occupy a middle ground between natural methods and in-office procedures. Whitening strips, toothpastes, and custom trays deliver varying results depending on your stain type, tooth alignment, and commitment to the protocol. Knowing which products work for which situations, and how to manage sensitivity before it becomes unbearable, helps you achieve professional-grade results at home without wasting money on ineffective options.
1. Whitening strips: who they fit best, timeline, and common mistakes
Whitening strips are thin plastic films coated with 6% to 10% hydrogen peroxide gel. The strips adhere to your front teeth, usually 10 upper and 8 lower teeth, and deliver peroxide for 30 to 60 minutes per day. Most brands recommend 10 to 14 days of continuous use to see results.
Strips work best for patients with straight, evenly aligned teeth. The strip needs full contact with enamel to transfer the gel effectively. Crowded, rotated, or overlapping teeth create gaps where the strip does not touch. These areas receive no whitening agent and stay darker than treated surfaces, creating a striped appearance.
The typical timeline shows visible improvement after 3 to 5 applications. You reach maximum results around day 10 to 12. Continuing beyond 14 days rarely produces additional whitening but does increase sensitivity risk. The improvement ranges from 1 to 3 shades on a dental shade guide, depending on starting color and stain type.
Common mistakes include: firstly, not drying teeth before application (saliva dilutes the gel); secondly, wearing strips longer than directed (increases sensitivity without extra whitening); thirdly, skipping days (breaks the chemical process and delays results). Another frequent error is eating or drinking immediately after removing strips, the enamel pores remain open for 30 to 60 minutes and absorb pigments more readily during this window.
2. Whitening toothpaste/mouthwash: what they can realistically change (and what they can’t)
Whitening toothpastes contain mild abrasives and chemical agents that remove surface stains. The abrasives (hydrated silica, calcium carbonate) polish away deposits. Some formulas add low-concentration peroxide (1% to 2%) or blue covarine pigments that make teeth appear brighter through an optical effect.
Realistic expectations mean understanding the 1-shade improvement maximum. Whitening toothpastes cannot change internal tooth color or address deep-set stains. They maintain results from professional whitening treatments or remove new surface stains before they bond permanently. Think of them as stain prevention tools rather than active whitening treatments.
Whitening mouthwashes contain even lower peroxide concentrations (1% to 1.5%) because the contact time is brief, 30 to 60 seconds. The peroxide has minimal time to penetrate enamel. These products freshen breath and may provide marginal stain prevention, but clinical studies show no measurable shade change compared to regular mouthwash.
The best use case for whitening toothpaste is daily maintenance after professional bleaching. BrightSmile Dental Clinic recommends specific whitening toothpaste brands that balance effectiveness with low abrasivity (RDA 70 to 100) to protect enamel during long-term use. Switching from regular toothpaste to whitening toothpaste alone produces disappointing results if your teeth are already heavily stained or naturally yellow.
3. Dentist-supervised custom trays: “best middle option” for many people (2-week model)
Custom whitening trays offer professional-grade results at roughly half the cost of in-office treatments. The process begins with impressions of your teeth. The lab fabricates flexible plastic trays that fit precisely over your dental arches. This custom fit prevents gel from leaking onto gums and ensures even coverage.
The dentist provides carbamide peroxide gel in 10% to 22% concentration, stronger than over-the-counter strips but gentler than in-office formulas. You fill each tray with a small amount of gel and wear them for 1 to 2 hours daily (or overnight for lower concentrations). The 2-week protocol typically delivers 4 to 6 shade improvement.
This method gives you control over sensitivity management. You feel sensitivity starting after day 3 to 4, so you can skip a day or reduce wear time. The flexibility prevents the intense discomfort that some patients experience with in-office whitening, where the full treatment happens in one sitting.
The “middle option” label refers to cost and results. Custom trays cost approximately NPR 8,000 to 12,000 in Kathmandu, less than in-office whitening (NPR 15,000 to 22,000) but more than strips (NPR 2,000 to 4,000). You achieve nearly the same shade change as in-office treatment but over 2 weeks instead of 1 hour. Most Kathmandu professionals choose this option because it fits their budget and schedule while delivering professional results.
4. Sensitivity & gum irritation protocol: prevent, pause, restart safely
Sensitivity occurs when peroxide penetrates enamel and irritates nerve endings in dentin. The sensation ranges from mild tingling to sharp pain triggered by cold air, sweet foods, or pressure. Approximately 60% to 70% of whitening patients experience some sensitivity, usually starting on day 2 to 5.
Prevention starts before treatment. Use desensitizing toothpaste containing potassium nitrate for 1 to 2 weeks before whitening. The potassium ions calm nerve endings and reduce the sensitivity response. Continue using desensitizing toothpaste throughout treatment and for 1 week afterward.
The pause protocol applies when sensitivity becomes uncomfortable. Skip 1 to 2 days of whitening to allow nerves to settle. Reduce tray wear time from 2 hours to 1 hour, or switch from 16% gel to 10% gel. Most sensitivity resolves within 24 to 48 hours of pausing. You restart at the reduced intensity and gradually increase as tolerance improves.
Gum irritation appears as white patches or red, tender areas where gel contacted soft tissue. This happens when trays fit poorly or you overfill them with gel. The tissue heals within 3 to 5 days without treatment. Prevent recurrence by using a smaller gel amount, a thin ribbon that does not overflow when you insert the tray, and wiping excess gel from gums immediately after insertion.
Severe pain, bleeding gums, or sensitivity lasting more than 1 week requires professional evaluation. These symptoms may indicate underlying dental problems, cracked teeth, leaking fillings, or gum disease, that whitening has revealed. Address these issues before continuing treatment.
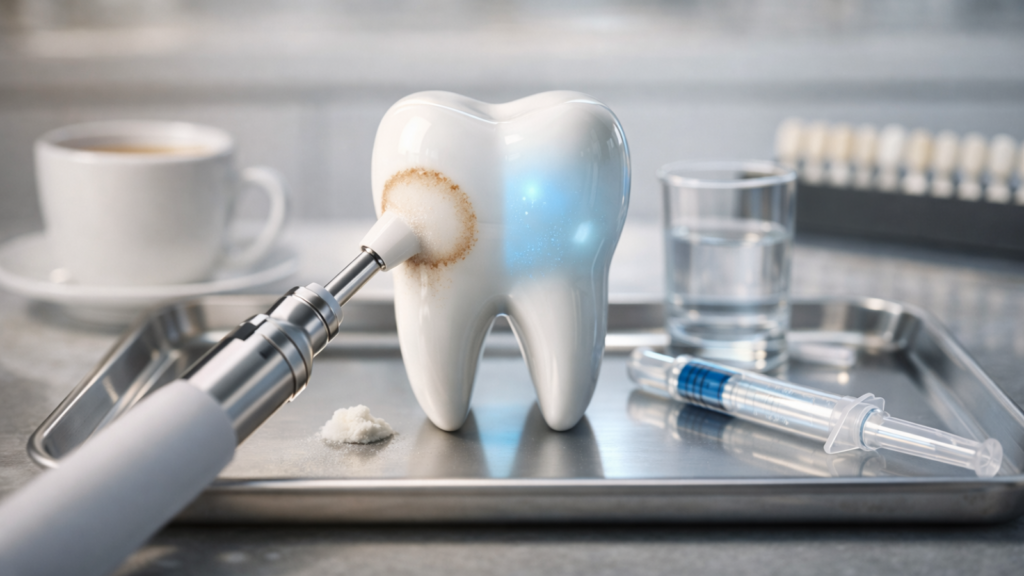
Professional Whitening in Kathmandu: What You Get and What to Ask
In-office whitening delivers the fastest, most dramatic results, but the quality varies significantly between Kathmandu clinics. Understanding the step-by-step process, what drives price differences from NPR 15,000 to NPR 25,000, and which safety protocols protect you from chemical burns reveals whether a clinic uses legitimate products and proper techniques. Knowing the right questions to ask before treatment, about gel sourcing, gum protection, and realistic shade improvement, prevents disappointing results and dangerous shortcuts.
In-office whitening step-by-step: isolation, gel cycles, expected results
The dentist begins by recording your current tooth shade using a standardized shade guide. This documentation proves the treatment’s effectiveness and manages expectations. Photos from multiple angles capture the before state. The entire appointment takes 60 to 90 minutes from start to finish.
Isolation protects your soft tissues from the high-concentration gel (25% to 40% hydrogen peroxide). The dentist applies a liquid rubber dam or protective resin along your gum line, then hardens it with a curing light. This barrier prevents chemical burns. Cheek retractors hold your lips away from teeth, and cotton rolls absorb saliva.
The whitening gel goes on in 3 to 4 cycles. Each cycle lasts 15 to 20 minutes. The dentist applies gel, monitors your comfort, then suctions it off before the next application. Some protocols use LED or laser activation between cycles, more on this in the next section. The gel works by releasing oxygen molecules that penetrate enamel and break apart stain compounds.
Expected results range from 4 to 8 shade improvements immediately after treatment. Your teeth appear brightest right after the procedure. Expect slight shade relapse over 24 to 48 hours as enamel rehydrates, you might lose 1 to 2 shades from the immediate result. The final stable shade settles by day 3 to 5. Most Kathmandu patients achieve satisfactory brightness (A2 to B1 on the Vita shade guide) from one session, though heavily stained teeth may require a second session after 2 to 3 weeks.
LED/laser activation: when it may help, and what evidence warns about sensitivity
LED lights and lasers generate heat that theoretically accelerates peroxide breakdown. Manufacturers claim this speeds up the whitening reaction and improves results. Some studies show marginal improvement, 0.5 to 1 additional shade, compared to gel alone. Other studies find no significant difference, suggesting the extended contact time (not the light) drives the results.
The evidence on sensitivity presents a clearer picture. Heat from activation devices opens dentinal tubules wider, allowing more peroxide to reach nerve endings. Patients who receive light-activated whitening report 20% to 30% higher sensitivity rates compared to those who receive gel-only treatment. The sensitivity tends to be sharper and lasts longer.
When light activation may help: heavily stained teeth (from tetracycline or fluorosis) that resist standard gel treatment; patients seeking maximum whitening in a single visit; cases where the dentist uses a lower peroxide concentration and relies on heat to compensate. BrightSmile Dental Clinic offers both LED-activated and gel-only protocols based on your stain type and sensitivity concerns.
The realistic stance acknowledges that light activation adds cost (NPR 2,000 to 5,000) for questionable benefit in most cases. You get slightly better results with moderately higher sensitivity risk. Patients with existing sensitivity, thin enamel, or gum recession should skip light activation. Those with stubborn stains and high pain tolerance may find the marginal improvement worthwhile.
Kathmandu pricing and what changes the fee (examples and what’s included)
In-office whitening in Kathmandu ranges from NPR 15,000 to 22,000 as of January 2026. The price variation reflects different gel systems, clinic location, and included services. If you’re comparing providers, browsing options for dental in Kathmandu can help you assess what reputable clinics include in their packages. Budget clinics near Ratna Park charge NPR 12,000 to 15,000 for basic gel-only treatments. Premium clinics in areas like Lazimpat or Durbarmarg charge NPR 20,000 to 25,000 for branded systems (Zoom, Opalescence) with LED activation.
What changes the fee: firstly, gel brand and concentration (imported US brands cost more than Indian generics); secondly, LED or laser activation adds NPR 2,000 to 5,000; thirdly, follow-up kits with desensitizing gel or custom trays add NPR 3,000 to 5,000; fourthly, dentist experience and clinic reputation. Some clinics include post-whitening polish and fluoride treatment at no extra charge.
Here are typical Kathmandu packages:
- Basic package (NPR 15,000 to 17,000): Examination, shade assessment, gum protection, 3 gel cycles, post-whitening instructions.
- Standard package (NPR 18,000 to 20,000): Everything in basic plus LED activation, desensitizing gel kit, shade guide photo documentation.
- Premium package (NPR 21,000 to 25,000): Branded gel system, laser activation, custom trays for touch-ups, 6-month maintenance kit.
BrightSmile Dental Clinic’s in-office whitening costs NPR 18,500 and includes examination, professional cleaning, gum isolation, 3 to 4 gel cycles with optional LED activation, sensitivity management protocol, and a take-home desensitizing kit. This falls in the mid-premium range with transparent inclusions.
Clinic safety checklist: gum protection, shade recording, aftercare, counterfeit-gel warnings
Proper gum isolation is non-negotiable. The dentist should apply a liquid dam or protective barrier before gel touches your teeth. The barrier should cover 2 to 3 millimeters of gum tissue beyond the tooth edge. Skipping this step causes chemical burns that hurt for days and may damage tissue permanently. Ask to see the isolation material before treatment begins.
Shade recording creates objective proof of results. The dentist should use a Vita shade guide (the industry standard) and document your starting shade in your chart. Photos from consistent angles under natural light capture the before state. Without documentation, you have no way to verify improvement or hold the clinic accountable for poor results.
Aftercare instructions should cover: firstly, sensitivity management (desensitizing toothpaste, pain medication if needed); secondly, the 48-hour white diet (avoid dark foods and drinks); thirdly, touch-up timing (when to return if results fade); fourthly, long-term maintenance habits. The dentist should provide written instructions, not just verbal guidance you might forget.
Counterfeit gel represents a serious concern in Kathmandu. Unregulated products from unclear sources flood the market at prices 40% to 60% below legitimate brands. These gels may contain incorrect peroxide concentrations, contaminants, or unstable formulas that cause uneven results and excessive sensitivity. Ask your dentist about gel sourcing and look for sealed, branded packaging with batch numbers and expiration dates. Legitimate clinics store gels in refrigerators to maintain chemical stability, ask to see the storage method.
Keeping Results Longer (and When Whitening Isn’t the Right Treatment)
Whitening results fade gradually over 6 to 24 months depending on your lifestyle habits and maintenance routine. The first 48 hours after treatment determine how quickly stains return, while long-term habits control whether you need touch-ups every 6 months or every 2 years. Some discolorations, fluorosis, tetracycline staining, and certain internal discolorations, respond poorly to whitening and require alternative treatments like bonding or veneers for satisfactory results.
First 48 hours after whitening: what to avoid and why (“stain rebound” period)
Enamel pores remain enlarged for 24 to 48 hours after whitening treatments end. The peroxide opens microscopic channels in enamel’s crystalline structure. These channels allow the whitening agent to penetrate, but they also make teeth vulnerable to staining during the rehydration period. Consuming pigmented foods or drinks during this window causes rapid, intense discoloration.
The “white diet” restricts all colored substances, especially when your mouth is extra reactive after whitening, see why teeth feel sensitive to hot and cold and what actually helps. Avoid coffee, tea, red wine, colored sodas, curry, tomato sauce, soy sauce, berries, dark chocolate, and tobacco. Stick to water, milk, white rice, chicken, fish, bananas, cauliflower, and other light-colored foods. Even healthy foods like blueberries or beets can stain during this sensitive period.
Smoking causes some of the fastest stain rebound. Tobacco tar penetrates open enamel pores within minutes. Patients who smoke during the 48-hour window often see their teeth return to pre-treatment color within 1 week. The investment in whitening (NPR 15,000 to 20,000) gets wasted entirely. We tell smoking patients to either quit for 3 to 5 days or delay whitening until they are ready to pause.
Temperature extremes also matter. Very cold or very hot foods can trigger sensitivity and cause microscopic enamel stress during rehydration. Let coffee cool to warm rather than hot; avoid ice cream and frozen drinks. Room temperature or slightly chilled foods cause less discomfort and enamel stress.
How long whitening lasts and touch-up timing (realistic ranges)
In-office whitening results last 6 to 24 months depending on lifestyle habits. Heavy coffee drinkers, tea enthusiasts, and smokers see fading within 6 to 9 months. Patients who avoid staining substances and maintain excellent hygiene keep results for 18 to 24 months. Most Kathmandu patients fall in the 10 to 14 month range given our tea culture and coffee consumption patterns.
Gradual fading happens as new surface stains accumulate and enamel pores close. You will notice your teeth slowly shift back toward their baseline color rather than changing overnight. The first areas to darken are usually the edges of front teeth and the spots where you sip coffee or tea.
Touch-up timing depends on your satisfaction threshold. Some patients touch up every 6 months to maintain peak brightness. Others wait until fading becomes noticeable, typically 12 to 18 months. Custom tray systems make touch-ups easy: purchase new gel (NPR 2,000 to 3,000) and wear trays for 3 to 5 days. This refreshes results without the full 2-week protocol.
Professional touch-ups at the clinic cost less than initial treatment. Expect to pay NPR 8,000 to 12,000 for a single gel cycle session. The dentist reassesses your teeth, addresses any new dental work, and applies one round of high-concentration gel. This works well for patients who prefer supervised treatment or have sensitivity concerns that home trays cannot address.
Tough stains: fluorosis/white spots, tetracycline stains and what’s realistic, what’s next
Fluorosis creates white or brown spots from excessive fluoride during childhood tooth development. The white spots are areas of hypomineralization, enamel that formed with defective crystal structure. Bleaching these teeth often worsens the appearance because the white spots brighten faster than surrounding enamel, creating a mottled look.
Mild fluorosis (faint white lines) may improve with careful whitening that brings the darker areas up to match the white spots. Moderate to severe fluorosis (chalky white patches or brown staining) responds poorly to whitening alone. These cases benefit from microabrasion (gentle enamel polishing) followed by whitening, or direct composite bonding to mask the spots entirely. Veneers provide the most predictable aesthetic result for severe cases.
Tetracycline staining appears as gray, brown, or blue bands in teeth. This occurs when children take tetracycline antibiotics while permanent teeth are forming (ages 0 to 8 years). The antibiotic binds to calcium in developing enamel and dentin, creating permanent internal discoloration that whitening cannot fully remove.
Realistic expectations for tetracycline stains mean understanding the limitations. Mild gray staining may lighten 2 to 4 shades with aggressive whitening protocols, custom trays worn 4 to 6 hours daily for 3 to 6 months. Moderate banding may improve slightly but remains visible. Severe blue-gray staining rarely responds to whitening. Patients invest significant time and money (NPR 15,000 to 30,000 for extended treatment) for modest improvement. Veneers or crowns offer more dramatic results for severe tetracycline cases, though at higher cost (NPR 15,000 to 35,000 per tooth).
Alternatives to whitening: polishing, bonding, veneers and matching old dental work
Professional polishing removes surface stains and restores natural brightness without chemicals. The hygienist uses a rubber cup or air polisher with fine pumice or bicarbonate powder. This mechanical cleaning eliminates coffee rings, tea stains, and soft plaque deposits. Polishing costs NPR 1,000 to 1,500 as an add-on to regular cleaning and produces immediate visible improvement for surface-stained teeth.
When whitening alone falls short, the choice usually comes down to veneers, crowns, or composite bonding, each suited to different stain types, budgets, and longevity expectations. Composite bonding applies tooth-colored resin over discolored enamel. The dentist etches the surface, applies bonding agent, then sculpts composite in your desired shade. This works well for isolated dark teeth (from root canal treatment or trauma), fluorosis spots, or tetracycline banding on one or two teeth. Bonding costs NPR 4,000 to 8,000 per tooth and lasts 5 to 7 years before requiring touch-up or replacement.
Porcelain veneers provide the most dramatic transformation. The dentist removes 0.5 millimeters of front enamel, takes impressions, and bonds lab-made porcelain shells to your teeth. Veneers can achieve any shade, including Hollywood white, and mask severe stains, shape irregularities, and gaps simultaneously. Cost ranges from NPR 15,000 to 35,000 per tooth in Kathmandu. Veneers last 10 to 15 years with proper care.
Matching old dental work presents a common dilemma. You whitened years ago and now have front fillings that match your old darker shade. Your options are: firstly, replace the fillings with composite in your current tooth color (NPR 3,000 to 6,000 per filling); secondly, whiten again to brighten natural teeth, then replace fillings to match the new shade; thirdly, accept the slight color difference if fillings are small and inconspicuous. Planning these treatments together minimizes cost and visits, whiten first, wait 2 weeks for shade stabilization, then replace visible restorations in a single appointment.
Is teeth whitening safe, or does it damage enamel?
Teeth whitening is safe when used correctly and under dental supervision. Whitening products do not strip enamel, but overuse or strong DIY methods can irritate gums and increase sensitivity. Problems usually arise from misuse, untreated dental issues, or using overly strong products.
Why do my teeth hurt after whitening and how do I stop sensitivity?
Teeth hurt after whitening because bleaching opens microscopic enamel channels, exposing nerves. Sensitivity is temporary. Reduce pain by pausing whitening for 2–3 days, using sensitive-tooth toothpaste, and avoiding cold foods. Shorter or spaced-out sessions also help. Persistent pain or gum burns require a dentist checkup.
Does baking soda whiten teeth, and how often is safe?
Baking soda whitens teeth by removing surface stains through mild abrasion. It does not bleach enamel like peroxide. Use it gently 1–2 times per week to avoid enamel wear, especially if you already have acid reflux–related enamel erosion and sensitivity. Avoid combining with acids like lemon or vinegar, which increase enamel erosion and sensitivity.
Is charcoal whitening safe or effective?
Charcoal whitening can remove surface stains but may damage enamel through abrasion. It does not whiten deeper tooth layers and often causes uneven results. Most charcoal products lack fluoride, reducing cavity protection. Dentist-approved peroxide methods are safer and more effective.
Do oil pulling or turmeric actually whiten teeth?
Oil pulling and turmeric do not whiten teeth. Oil pulling may reduce plaque, while turmeric can stain surfaces and leave residue. Neither method changes tooth color or replaces peroxide whitening. Use them as optional hygiene add-ons, not as whitening solutions.
What’s better: strips, trays, or in-office whitening?
Custom trays offer the best balance of comfort and results. Strips are affordable and good for mild stains but can miss spots. In-office whitening is fastest but may cause more sensitivity. Choose based on your stain level, sensitivity, and whether you need fast results.
How long do whitening results last?
Whitening results last from a few months to two years, depending on habits like coffee, smoking, and oral care. Stains return faster with dark drinks or tobacco. Maintain results with cleanings and occasional touch-ups. Most people need whitening once, then maintain color over time.
Can whitening fix one dark tooth (after injury or root canal)?
Whitening usually cannot fix a single dark tooth caused by trauma or root canal. Internal bleaching or cosmetic treatments like bonding or veneers are better options. A dentist must first check for cracks or infection. Treatment depends on the cause and tooth health.
Can I whiten if I have fillings/crowns/veneers?
You can whiten teeth with fillings, crowns, or veneers, but only natural enamel changes color. Dental work remains the same shade, possibly causing a mismatch. Dentists often recommend whitening before replacing visible restorations to match the new tooth shade.
How much does teeth whitening cost in Kathmandu?
Teeth whitening in Kathmandu costs vary: OTC strips are cheapest, dentist-supervised trays are mid-range, and in-office whitening is most expensive. Final cost depends on stain severity and session number. Ask for a detailed package breakdown, including touch-ups and exams, and review teeth whitening packages and pricing details before you choose a method.
Is whitening okay during pregnancy or breastfeeding?
Teeth whitening is not recommended during pregnancy due to sensitivity and limited research. During breastfeeding, many dentists advise postponing unless supervised. For a safer alternative, get a professional cleaning to brighten teeth temporarily without chemicals.
Is teeth whitening safe for teens? When should they start?
Teeth whitening is safe for teens under dental supervision. Many dentists recommend waiting until late teens or after braces. If discoloration affects confidence, use mild methods and get a checkup first to rule out cavities or enamel issues.
If you’re preparing for a wedding, photoshoot, or event, you may want to explore a smile makeover for weddings and special occasions alongside your whitening plan. For personalized whitening advice, contact BrightSmile Dental Clinic at +977-9748343015 or visit our Putalisadak location for a comprehensive smile assessment. Our examination (NPR 500) includes shade analysis, stain-type diagnosis, and a customized treatment plan that matches your goals and budget. We help you choose between home methods, custom trays, and in-office treatment based on evidence, not marketing.